Showing posts with label crochet. Show all posts

Sunday, July 25, 2010

Crochet Hook Roll - Finished!

It's been a few weeks - but it is done!

This ...

is now this:


Complete with scissors pocket...


...and a place to stash stitch markers.

These pictures hide nicely my inability to make the pockets straight - so perhaps I'll never sell these guys, or be a good seamstress :) But I have a cute place to store my crochet stuff, so I'm happy!

Sunday, July 11, 2010

Crochet Hook Roll

My dad used to have a great cloth roll out in the garage for his wrench sets, denim blue and dirty. This, once I figure out how to assemble it, will be a crochet hook roll, far prettier, but equally functional! It will have two rows of slots for hooks and two wider pockets for scissors, needles, pens and the like, and a small ribbon for holding stitch marker rings. Hopefully it will materialize in the next week or so!

Tuesday, June 29, 2010

Floor Work & Poor Little Feetses

I just started taking an intro to floorwork class with my bellydance troupe, and am (not surprisingly) loving it. One of my lovely teachers has a pair of these nifty little (for lack of a better name) footies she got years ago to protect the tops of your feet while sliding around on floors.

"Can you make some of these? I bet all these girls would buy them!"
Well, of course, I had to try. So, this is round one.

They don't take long - except when you forget to write down what you did on the first one and have to pull out every other row on #2  :)

Lesson learned: write down what you do!

There will definitely be more of these coming, probably for the ladies in my class, and maybe, just maybe, I'll get around to some stuff to get the Etsy shop up and running :)

Tuesday, June 8, 2010

Buggs II

My second pair of baby Uggs, by Crochetroo on Ravelry. The first were for an almost-here-now baby boy - this pair is for a little baby girl. Love them!

Sunday, April 25, 2010

Critter's Coat

The other half of my baby shower gift for my momma-to-be cousin, Critter's Coat is pretty directly [shamelessly] copied from another on Ravelry (Thanks, YarnSide!). However, I like it like that :)
This pattern makes two big "6-sided squares" - by which I mean shapes with 6 sides and 90 degree corners. These obviously don't lay flat, until you fold them in half to form the two sides of the coat. Neat construction!
Yarn: Lion's Pride Vanna's Choice Olive & Pea Pod
Critter's Coat and Baby Buggs on my stunning model :)

June 22 - Dear Evan Riley ... four days wasn't enough. Your mommy and daddy love and miss you, and people all over this world have been praying for you and crying over you, but we'll see you one day. We will always ask why - but we have seen how you have made a mark on this world and on so many lives. Meet you on the other side, Critter.

Monday, April 5, 2010

Grandma's Stash

My Swedish grandmother (whom we call FarMor - "father's mother") was my very first (and of course, most inspirational!) crochet teacher. I never made much of myself back then - I think I started many numbers of things, but only ever finished a pair of shoelaces! - but was always impressed with her work, including a great many afghans I love dearly.

I had fun sharing my newly rediscovered hobby with her, and I think she enjoyed it as well. My (early) birthday gift from her arrived today. What more could you want but a bit of grandma's stash? Thanks, FarMor!

Saturday, April 3, 2010

Buggs

I don't know if my cousin reads my blog or not, but she will get a sneak peak at part of her baby shower gift if she does.

I found this adorable pattern from Crochetroo on Ravelry while hunting around for cute Aussie baby gifts. I hope she likes these "buggs" - baby Uggs :)

Brown & green - Galway worsted wool; White - Lamb's Pride worsted wool-mohair
June 22 - Dear Evan Riley ... sometimes life is too short. You are so loved, though we won't meet you this side of heaven. Someday another little one will walk in these shoes and your mommy and daddy will think of you and those four short days - and one day they'll hold your hand on the other side. You won't be forgotten, courageous little warrior.

Wednesday, March 31, 2010

For my Feathered Friends

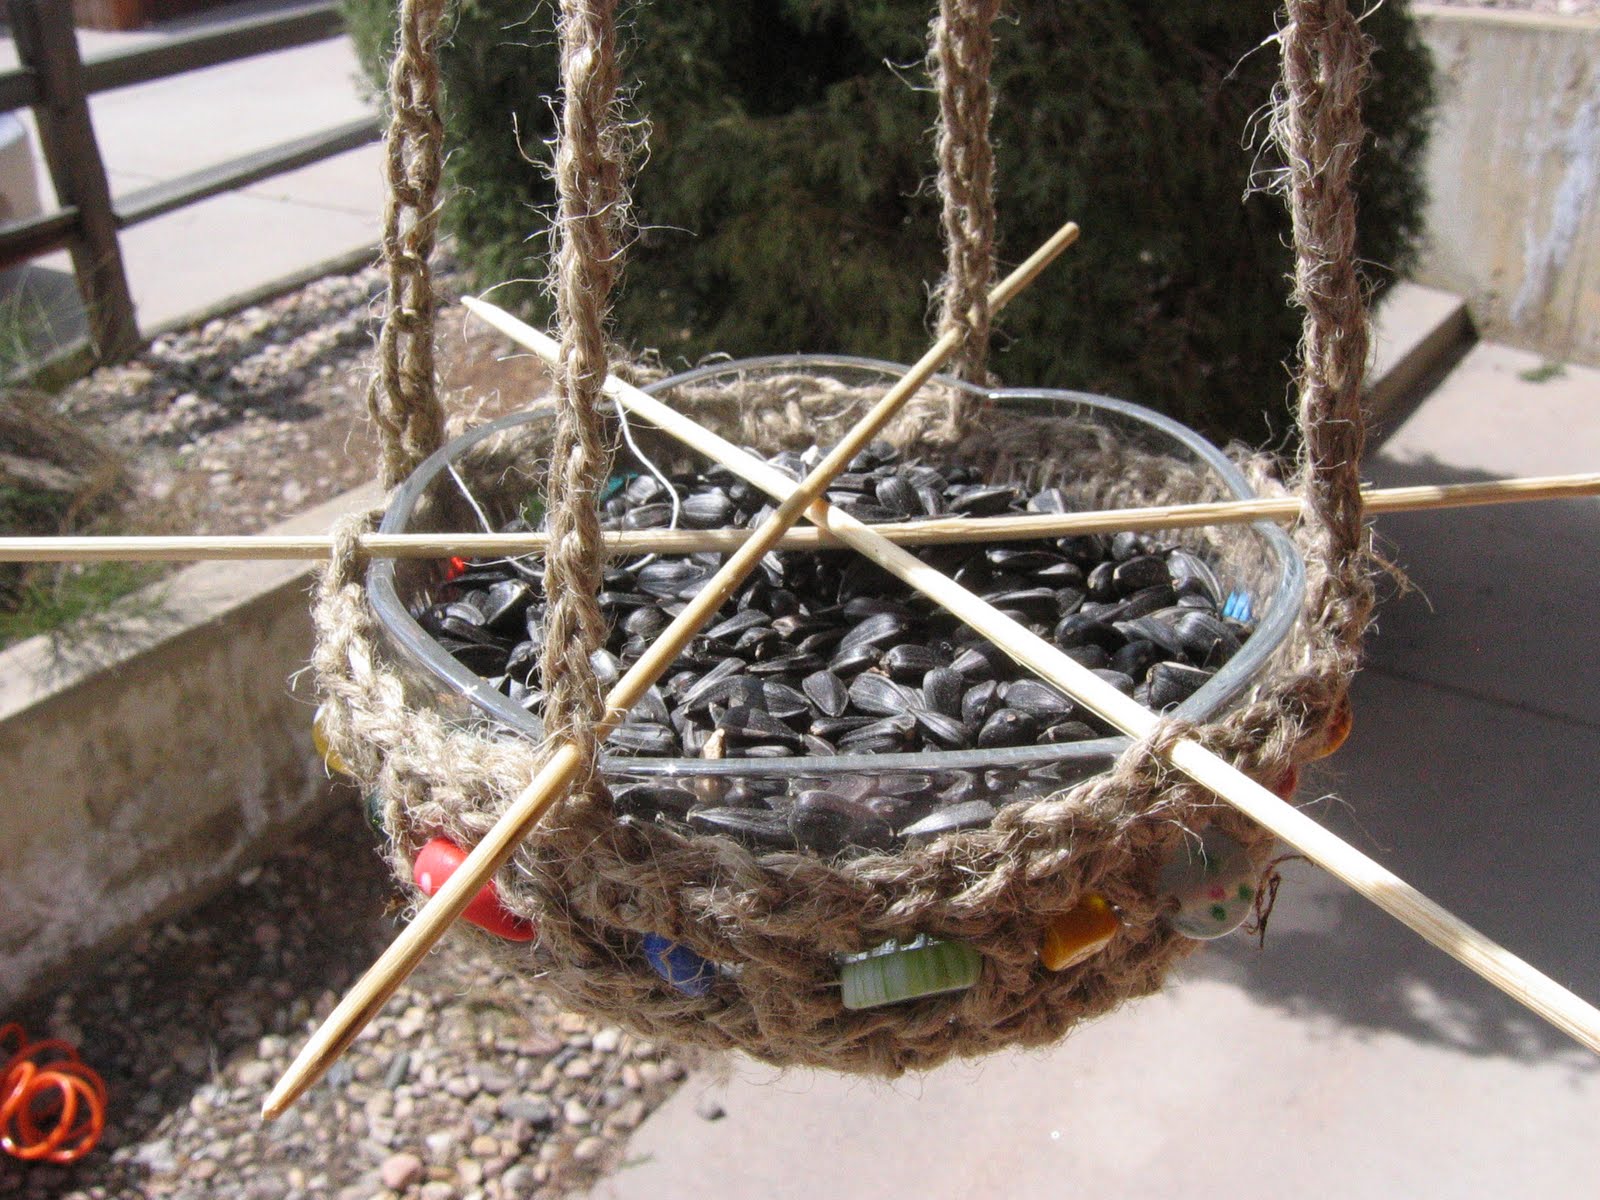
Since moving to Colorado, I've been enjoying all the "new" birds that show up outside my window. None terribly rare, but there's rather little overlap in the ranges of birds between here and PA! With spring finally here, bird feeders are in order.

This the first of two or three crocheted feeders that are going up outside the window in front of my computer - hopefully to attract many pretty birds!

Tuesday, March 30, 2010

Argyle Fans Wristwarmers

This pattern is worked in rows, but joined in the round at the end of each to make a seamless (hooray!) glove.

Materials:
1 skein worsted weight yarn
H/5.0 mm crochet hook
Yarn needle

Stitches & Abbreviations:
fsc foundation chain stitch
ch chain
sc single crochet
dc double crochet
sl st slip stitch
sp space

FSC 28 (multiple of 4), join w/sl st

Row 1: ch 3, 2 dc in same st, skip 3 st, sc in next st; *ch 3, 3 dc in same st, skip 3 st, sc in next st* repeat around; TURN - join w/sc in beginning sl st, ch 3, join w/sl st it 3rd ch, turn, sl st in ch-3 sp just made (note: this turn is covered by sc at end of each new row and will not be visible)

Row 2-11: ch 3, 2 dc in same ch-3 sp; *sc in next ch-3 sp, ch 3, 3 dc in same ch-3 sp* repeat around; TURN - join w/sc in same ch-3 sp as ch-3 at row start, ch 3, join w/sl st in 3rd ch of starting ch-3, turn, sl st in ch-3 sp just made

12th row (base of thumb) increase: same as rows 2-11, but opposite turns, add one pattern segment. After a sc in ch-3 sp, modify next pattern segment as follows:
- ch-3, 2 dc in same ch-3 sp, ch 2, sc in same ch-3 sp (the ch-2 and sc serves as the third dc in this pattern segment);
- ch-4, then 3 dc in 1st ch (adds a second pattern segment); sc in next ch-3 sp;
continue remainder of row the same as rows 2-11. Picture at right shows the two pattern segments of increase. Stitch diagram below shows the increase in symbols, with arrows showing the direction of stitching.

Rows 13-17: continue same as rows 2-11 (now with one additional pattern repeat in each row)

Row 18 (thumb space): skip the pattern segment directly above/between the increase and the pattern segment before it from row 12; to do this, work as follows after a normal pattern segment ending in a sc in the ch-3 sp prior to the segment to be skipped:
- ch 4, 3 dc in first ch; skipping over 1 pattern segment, sc in NEXT ch-3 sp and continue as with previous rows. This is the same stitch used for the increase.
(For larger thumb opening, substitute 2 dc and 1 tc for the 3 dc, and/or add 1 ch before the sc in ch-3 sp.)

Row 19: same as previous rows

Row 20 (final row): same as previous except: replace every ch-3 with a ch-2; 3 dc instead of 2 dc in first ch-3 sp; at end, sl st into first ch-3 sp and finish off.

Thumb: reattach yarn in ch-3 sp on whichever side of the thumb opening that will allow you to work around the outside of the thumb in the correct direction (see picture at right). Work 4 pattern segments around outside of thumb (remembering to use only 2 dc in first pattern segment), then across thumb opening as in row 18. Turn (as in regular rows) and complete a second row (modified as in Final Row of glove), then finish off.

Wrist edging: close up any gap in foundation chain with tail of yarn. Reattach yarn in foundation chain and work a repeat of row 1 around the edge, with dcs in same stitches as in row 1. Work so stitches are pointed in diagonally opposite direction as row 1 (see picture at left).

Second glove: so that the second glove will be a mirror image at the edges, and not identical, turn the work inside out after the first couple rows and continue on normally. This swaps the "right" and "wrong" sides. Note that it also means the thumb will be done in the opposite direction.

PDF pattern also available.

 © K. Frank, Handmade Gypsy 2010. All rights reserved.
Creative Commons License

Monday, March 29, 2010

Spring Break!

Spring break, at last, is here. This means I've finally gotten time to hit the projects all lined up waiting for me!

First one up today is a pair of wristwarmers for my chiropractor, who saw a pair I'd made myself and liked them enough to ask me to make her a pair. I didn't have a pattern I liked, so made this one up, using a stitch pattern from Super Stitches Crochet. The pattern requires you to turn at each row, but there isn't much I dislike more in crochet than having to stitch up a completed object - and not being able to try it on as I go. After a few blunders, I managed to solve that problem, and work this connecting each row before turning - best of both worlds!
This picture shows them about half-done, after I'd figured out how to make an acceptable increase :) Pattern and finished picture coming tomorrow.

Friday, March 26, 2010

2009's Oddest

I don't normally post news links, but this one's rather appropriate - 2009's Oddest Book Title's winners include, at the top a book on crochet - and geeky crochet at that :) Congrats to Crocheting Adventures with Hyperbolic Plane on being stranger than anyone else!

Thursday, March 4, 2010

Le Bouteille d'Eau

Finally replaced the old, beat up (and probably BPA-laden, though I'm still not sure it's much of a big deal) Nalgene bottle this weekend with a shiny new Sigg. Loving the pretty Moroccan design on the outside, but after dropping it on my foot once, then on the floor (denting the bottom quite nicely), I thought some sort of holder was in order. Pulled out a few of the stitches from Crochet Kitten's Josephine collection (which I already borrowed for my bellydance belt) and whipped this up in just a couple hours of multi-tasking.

I was working on this at school a bit, and a few of my girls were requesting one for themselves :) Handy, pretty, and lets the design still show through!


The strap was done in two pieces, and instead of sewing them together, I made a nice long chain on each side and laced them together for an adjustable strap.

Sunday, January 3, 2010

Amigumicrobes #2: T7 Bacteriophage

in honor of Megan Thompson, who made this crazy request

Stitches:
  • Magic Ring
  • ch, sc, hdc, inc, dec
  • bl dec: insert hook into bl of 1st st from front, then into bl of 2nd st from back; yo pull through both loops and finish as normal sc (see pictures below)


Instructions:
Note: Omit italics (“Round _b”) for less of a point on top and bottom
Magic ring 6 sc
Round 1: even sc around (6 st)
Round 2: inc every (12 st)
Round 3: inc every other (18 st)
Round 3b: even sc around (18 st)
Round 4: inc every 3rd (24 st)
Round 5: inc every 4th (30 st)
Round 5b: even sc around (30 st)
Round 6: inc every 5th (36 st)
Round 7: inc every 6th; hdc both inc st, sc all others (42 st)

Round 8: sc around, bl only, bl dec every 6th st in hdcs (36 st)
Round 9-12: even sc around 4 rows (36 st)
Round 13: inc in every 6th st of previous row, beginning with 4th st (inc st 4,10,16,22,28,34) (42 st)

Round 14: bl hdc dec every 6th st, beginning with fourth st; sc in bl of all other st (bl dec 4,10,16,22,28,34; in inc st on previous row)(36 st)
Round 15: dec every 5th st, beginning with 3rd st (dec 3,8,13,18,23,28) (30 st)
Round 16: dec every 4th st, beginning with 2nd st (dec 2,6,10,14,18,22) (24 st)
Round  16b: even sc around
Round 17: dec every 3rd st, beginning with 1st st (dec 1,4,7,10,13,16) (18 st)
   insert safety eyes
   stuff
Round 18: dec every other st, beginning with 2nd st (dec 2,4,6,8,10,12) (12 st)

Round 19-22: even sc next 4 rows
Round 23 (“leg” round): sc, *ch 15, hdc in 2nd ch from hook and next 6 ch; 3 hdc in next ch; hdc in next 6 ch; sl st to join top of "leg" in post 2 rows back in line with "leg"; ch 1, sc in next st on current row* repeat around (12 st plus 6 legs)

Round 24: even sc around (12 st)
   stuff
Round 25: dec every st (6 st)
Round 26: even sc around (6 st)
   poke a bit more stuffing inside with flat end of hook if needed.
   finish off, stitch closed with remaining yarn and yarn needle, then hide end inside body

 © K. Frank, Handmade Gypsy 2010. All rights reserved.

Tuesday, December 22, 2009

Amigumicrobes

Tomorrow, I will be making a call to accept a middle school science teaching position (hooray!). A few problems... I left much of my teaching stuff at my old job - at least the things I thought I'd never use again (when I planned on never teaching again!). Sigh. I know I will have at least a few things to replace!

One thing I always meant to buy and never did was one of those awesome giant plush microbes. They'd be perfect for games, calling on students ("you only get to talk if you're holding the Flu!"), etc., aside from being just plain awesome. Well, having now discovered not only crochet, but also amigurumi, I think it only appropriate that I crochet said Flu (and friends) for my classroom! Sadly, Ravelry contains minimal microbe amigurumi patterns. It's like there aren't more biologists who crochet! Naturally, this means I'll need to try my hand at concocting a pattern (or a few) for amigurumicrobes :) Soon, there will be no shortage of germs to go around! I'm thinking middle schoolers will get a kick out of it, too!

Monday, December 21, 2009

Amigurumi

I have discovered Amigurumi. This is not good. I've made a little owl, a cthulu, half a baby dragon, and part of a big owl. I see no end in sight. I will, however, post pictures - just maybe not til I finish the mad rush of making caramels, baking cookies, bread, more cookies, more bread, a few more cookies just for good measure, lefse and perhaps go shopping for real food to make for Christmas dinner!

Monday, December 14, 2009

I might be crazy

I have to wonder how many UFOs and WIPs (that's Unfinished Objects and Works in Progress, for the unenlightened) are now floating around my house (all having appeared within the last 2 weeks!). Some crazy part of me decided to make Christmas gifts, using patterns I've never tried (obviously, since I just started crocheting!)... and this is the result. I can think of at least 4 or 5, off the top of my head. Most of those consist of equally unfinished pairs. I can only hope I will finish in time for Christmas! And I gained 2 skeins of gorgeous wool from a bellydance friend today - to make her 2 pairs of Surface Waves wrist warmers, which already make up 2 of my unfinished objects!

And why did I decide to make my own pattern for hand warmers?? I couldn't find one I liked well enough.... However, I am pleased with how they are turning out. That pattern will be posted soon!

Friday, December 11, 2009

Making Old Things New

Mira is probably the biggest inspiration for this. I envy her knack for finding the cheapest way to do everything (lessons, please?!). I'm learning, bit by bit. But really, what is more fun than taking something old and at the end of life and giving it a new one? So here are bits of some recent projects of ALL different types.

Recycled Lamb I had an old wool sweater that had finally gotten moth holes in it, and didn't want to give up on it. I found (or rather, was shown) this set of patterns for felted wool animals. Shrink, cut, sew, stuff - cute new toy :)
Buttermilk The stuff is so stinking expensive, yet so darn easy to make - take 1/4 C cultured buttermilk, add regular milk, leave on counter overnight. Done! Use some, refill with milk, repeat. Never-ending supply of cheap buttermilk.

Gleaned Yarn Found a nifty, loosely knit (and basically unworn) scarf at Goodwill for $2. Pulled apart for three balls of yarn! I LOVE the orange (all the colors are a bit darker than the picture shows). Now to decide what to do with them.

This one's definitely Mira's idea - despite the fact I've no baby butts to cover! 

New & Improved Darrell's  My favorite cookie recipe is and has been Darrell's Forget-the-Cookies-Just-Give-Me-That-Batter Chocolate Chip Cookie Dough from the Klutz Kids' Cookbook. This is my "New & Improved" version:
Mix & melt in pan or microwave:
   2 T butter
   6 T applesauce
Add & stir:
   2/3 C brown sugar
   1/3 C white sugar
When cool, add & stir together:
   1 t vanilla extract
   1 egg OR 1 T ground flax seed plus 3 T water - let sit 3 minutes before mixing in
In a separate bowl, mix together:
   1 1/2 C whole wheat flour
   1/4 t salt
   1/2 t baking soda (or a bit less, if you live way up high like me!)
   1/4 C wheat germ
   2 T flax seed (I just sprinkle some on top)
Add sugar mixture, mix well, then fold in:
   ~1 C (or a handful) Chocolate Chips
   ~1 C (or a handful) Oatmeal
   1/2 C chopped nuts (optional)
Place bowl in refrigerator for about 1 hour. Preheat oven to 375 F. Roll into walnut-sized balls and place on greased cookie sheet. Bake for 12 minutes - don't overbake! Eat & enjoy :)

Thursday, December 10, 2009

Who needs a teacher...

... when you have tutorials this awesome?

So as I said, I re-taught myself to crochet a few weeks ago. The entire process became infinitely easier when I happened upon Crochet Spot. You know how sometimes you go to look something up, and all you find on google are crappy YouTube videos and those terrible About.com links? No pictures, lots of words, not much help. This is NOT one of those sites.

Crochet Spot has awesome tutorials, step by step instruction, and a close-up picture of each step of each stitch. Brilliant! Everytime I find a new stitch, this is where I go to figure out HOW exactly to do it. Also, for you lefties, hover each picture for the mirror - left hand version. My only complaint - there's no index of all her "How To Crochet" tutorials. So I'm making one here (including hers and a few assorted others), as much for myself as for anyone who might find and read this post. Enjoy!

Getting Started:
How to Read a Crochet Pattern
How to Hold Yarn in Crochet
How to Crochet: Slip Stitch (sl st)
How to Crochet: Chain (ch)
How to Crochet: Foundation Single Crochet (fsc)
Another FSC tutorial from Snuffykins
"Magic Adjustable Ring" for Crochet in the Round

Regular Stitches:
How to Crochet: Single Crochet (sc)
How to Crochet: Extended Single Crochet (exsc)
How to Crochet: Half Double Crochet (hdc)
How to Crochet: Double Crochet (dc)
How to Crochet: Triple (or treble) Crochet (tc)

Increases & Decreases:
How to Crochet: Single Crochet Decrease
How to Crochet: Single Crochet Invisible Decrease
How to Crochet: Double Crochet Decrease
Another Invisible Decrease
I haven't found an "increase tutorial" yet - but as a general rule, just do 2 stitches in one stitch to add a stitch to the row.

Special Stitches:
How to Crochet: Front Post Double Crochet (fpdc)
How to Crochet: Back Post Double Crochet (bpdc)
How to Crochet: Tunisian Simple Stitch (tss)
How to Crochet: Tunisian Knit Stitch (tks)
How to Crochet: Popcorn Stitch
Loop and Nub decorative stitch Tutorials (from NeedleNoodles)

Ends:
How to Change Colors in Crochet
How to Finish off and Weave In Ends
How to Minimize Weaving In Ends
Joining Yarn: Russian Join

Other:
7 Tips for Consistency
Using Stitch Markers in Crochet
How to Crochet on the Opposite Side of a Chain
How to Find the End of the Yarn in a Pull Skein
Master List of Crochet Abbreviations

Monday, December 7, 2009

Hooks & Yarn

Back in the day, my grandmother taught me to crochet. I was never very good at it (always managed to miss a stitch!), but it was fun. I dropped it for 10 (15?) years, and never really thought twice about it until about 2 weeks ago when I decided to give it a try again in order to (what else?) make a bellydance belt.

What's that? Yes, bellydance. Like many things, this too is Aertimus's fault. First gypsies, now bellydance. Well, it was only a matter of time.
So, a bellydance belt. I couldn't find a pattern for one I liked, but did manage to find Crochet Kitten's AWESOME blog. She has a great set of bellydance patterns, and I promptly made myself a set of Josephine Gauntlets (for which I need to take a better picture - this one will do for now!).

But, alas, no belt. I liked the pattern well enough, though, to fumble through my own adaptation of the "Josephine" stitching, and came up with something I am quite please with! Add fringe (this is the pricey part - even cheap ribbon is not cheap when you need a yard and a half for each fringe!) and a cowrie belt I found at a thrift store last year, and voila! Awesome dance belt.


Crochet? Want a pattern? Here you go.


 © K. Frank, Handmade Gypsy 2009. All rights reserved.
Creative Commons License